
Managing and staying on top of your email is important to everyone. With Quick Steps (a feature in Microsoft Outlook 2010 and 2013) you can apply multiple actions at the same time to email messages. This helps you quickly manage your mailbox. For example, if you frequently move messages to a specific folder, you can use a Quick Step to move the message in one click. Or, if you forward messages to your manager or peers, a one-click Quick Step can simplify the task.
There are default Quick Steps that you can customize or you can create your own. When you use some Quick Steps for the first time, you are prompted to configure them. For example, if you want a Quick Step to move messages to a certain folder, you must specify the folder before you can use the Quick Step.
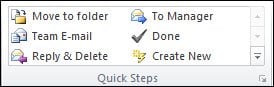
Default Quick Steps in Outlook 2010 and 2013 include the following:
Quick Step | Action |
Move To | Moves the selected message to a mail folder that you specify and marks the message as read. |
To Manager | Forwards the message to your manager. If your organization uses Microsoft Exchange Server, your manager’s name is detected in the Global Address List and inserted in the “To” box, or you can specify the recipient. |
Team E-mail | Forwards the message to others in your team. If your organization uses Microsoft Exchange Server, your team members names are detected in the Global Address List and inserted in the “To” box. |
Done | Moves the message to a specified mail folder, marks the message complete, and then marks it as read. |
Reply & Delete | Opens a reply to the selected message, and then deletes the original message. |
Create New | Create your own Quick Step to execute any sequence of commands, name it, and then apply an icon to help you identify it. |
To configure or change existing Quick Steps, do the following:
- In Mail, on the Home tab, in the Quick Steps group, click the More arrow at the side of the Quick Steps box, and then click Manage Quick Steps.
- In the Quick Step box, click the Quick Step that you want to change, and then click Modify.
- Under Actions, change or add the actions that you want this Quick Step to do.
- If you want, in the Shortcut key box, click a keyboard shortcut that you want to assign to that Quick Step.
- If you want to change the icon for a Quick Step, click an icon next to the Name box, click an icon, and then click OK.
To create a Quick Step:
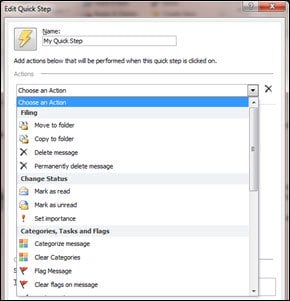
- In Mail, on the Home tab, in the Quick Steps group, in the Quick Steps gallery, click the Create New Quick Step.
- Click an action type from the list or click Custom.
- In the Name box, type a name for the new Quick Step.
- Click the icon button next to the Name box, click an icon, and then click OK.
- Under Actions, choose an action that you want the Quick Step to do. Click Add Action for any additional actions.
- To create a keyboard shortcut, in the Shortcut key box, click the keyboard shortcut that you want to assign.
New Quick Steps appear at the top of the gallery on the Home tab in the Quick Steps group. Although changed Quick Steps keep the same location in the gallery, you can rearrange them in Manage Quick Steps.